Tuesday, July 12, 2011
Wedding Photography : Mixing Up The Lighting Techniques
Do you like this story?
Wedding Photography : Mixing Up The Lighting Techniques. This recent post on lighting ideas for the romantic wedding portraits, showed that I like to mix it up a bit, and not rely on one specific. Tips & Tricks for Wedding Photography. Wedding photographs provide a bride and groom ... scenic backdrops, various lighting techniques, an assortment of lenses

using a variety of lighting techniques for wedding photography
This recent post on lighting ideas for the romantic wedding portraits, showed that I like to mix it up a bit, and not rely on one specific technique. Not every situation we’re going to encounter can be solved with one specific approach only. Mixing it up in terms of lighting also helps to provide my clients with more variety in the look of the final selection of images. In addition, it also keeps it interesting and fresh for me. Constantly adapting to challenges is part of the process of growing to be a better photographer.
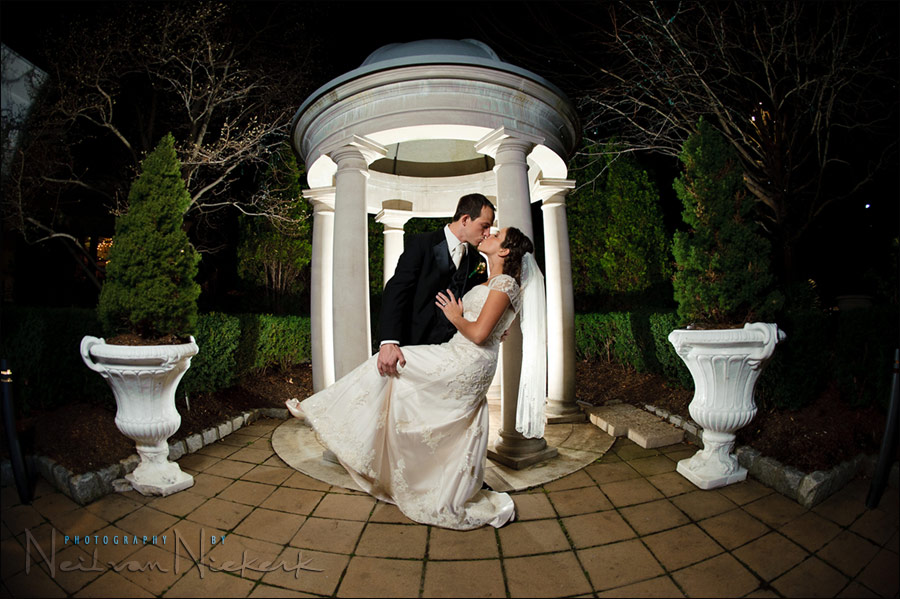
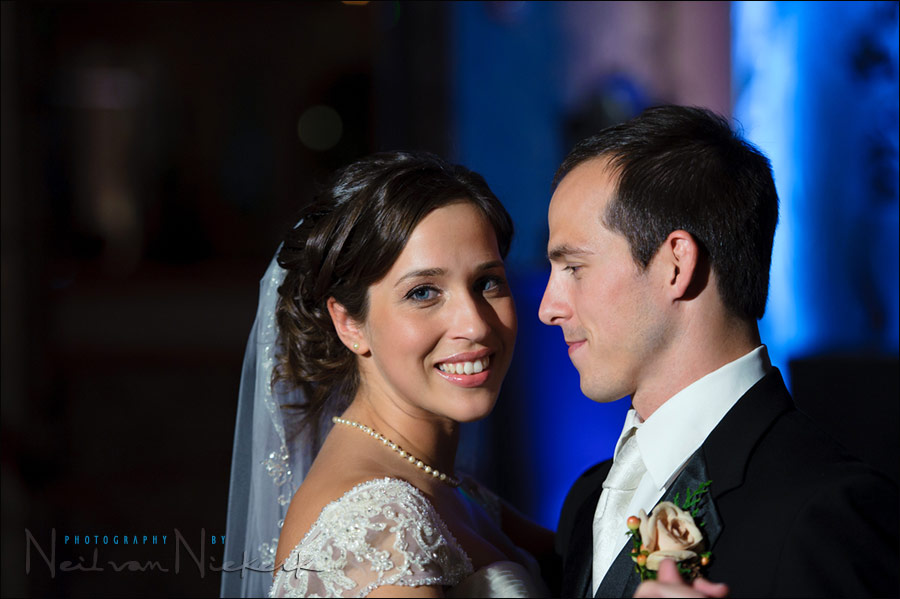
With the image at the top, I wanted something with a sense of the dramatic. I only had my assistant there with a softbox on a monopod. Just the one light. We were freezing, and had to move fast. So no time for more lights. To get this kind of separation between my subjects – the bride and groom – and still get even light on them, I simply made sure that my light was at an equal distance to both of them. This way there is no light fall off and one of them brighter or darker than the other …
Because of the inverse square law to how light spreads, there is always significant fall-off in light to the background. To overcome this, I made sure that in where I posed the groom, that he wasn’t too far from the softbox. Then I angled the bride into the light. To work fast, I used the slaved flash in TTL mode. I wanted the technology to help me. My on-camera flash was the Master speedlight, and had its own output disabled.
camera settings: 1/80 @ 6.3 @ 800 ISO
Nikon D3; (B&H); Nikon 24-70mm f2.8 AF-S (B&H) .. used at 5omm Nikon SB-900 (B&H); Nikon SD-9 battery pack (B&H); Lastolite EZYBOX 24×24 softbox (B&H)
![]()
Another wedding on a freezing cold late-November night. I knew I wanted some kind of kicker light behind them, so I carried a speedlight with me, already hooked up to a PocketWizard Plus II unit. These are not TTL capable, so I had to use it in manual. (Auto mode on the speedlight might be an option sometimes .. but not this time). I had the diffuser dome over it since I wanted it to be an omni-directional light source. I think I had it set it to 1/8 of full power, or perhaps 1/16th … anticipating how much would be juuust enough light behind them.
As the main light, I once again had my assistant hold a softbox up on a monopod .. but this time close to, and nearly above me.
The speedlight in the softbox was set to TTL, and controlled via my on-camera speedlight which was the Master flash. Once again, its own output was disabled, so that only the Slaved flash in the softbox added the main light. The flash in the background was in manual mode, and fired via a PocketWizard unit attached to it. This PocketWizard was tripped by the PocketWizard connected to the PC socket on my camera.
I used a fish-eye lens for the curviness of the image. Since a fish-eye lens distorts so much to the edges, it had to be a very centered composition. I think that centeredness helps the final image.
Nikon D3; (B&H); Nikon 16mm f2.8 fish-eye (B&H) Nikon SB-900 (B&H); Nikon SD-9 battery pack (B&H); Lastolite EZYBOX 24×24 softbox (B&H)
![]()
While I sometimes still use additional off-camera lighting at wedding receptions, it is less necessary now with high-ISO capable cameras. Especially when the reception venue has up-lighting, the use of additional off-camera lighting has a tendency to destroy the mood. Also, some reception venues are oddly shaped or have low or irregular ceilings, making placement of these additional lights a problem. That’s not even taking into account that the room might be crowded, or that a lone-standing light might be risky to leave where guests can bump into it.
The simplest technique then for me, is to allow as much of the available light in as I can, without risking too much ‘ambient smear’. I don’t want subject movement to be so pronounced that there is noticeable subject blur or camera shake. While I use a low-ish shutter speed then, I still favor a high ISO and wider apertures.
For the next two images, I used a single on-camera bounce flash to get (slightly) directional bounce flash on my subjects … while using a combination of camera settings to allow much of the ambient light in to still give context. I’d rather not have that ‘black hole’ background.
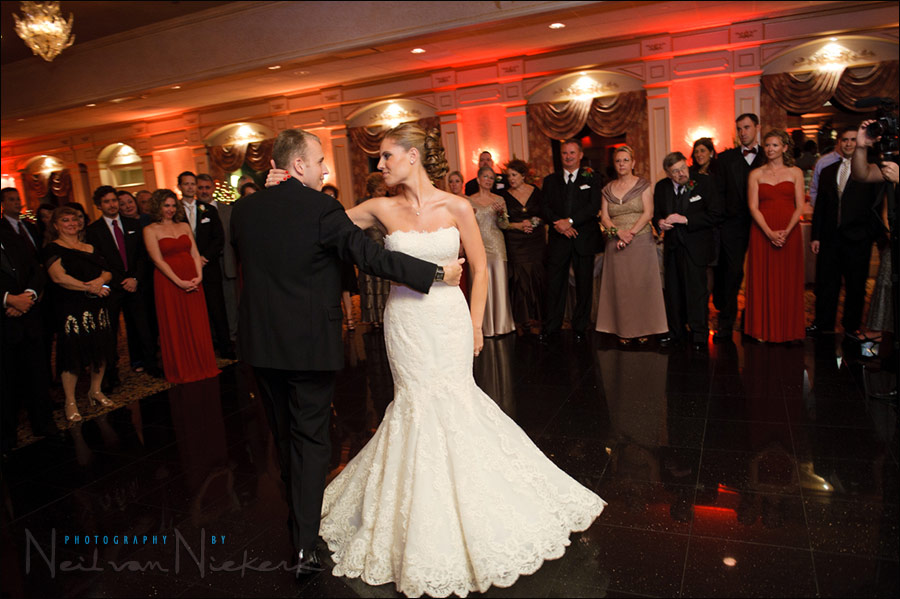
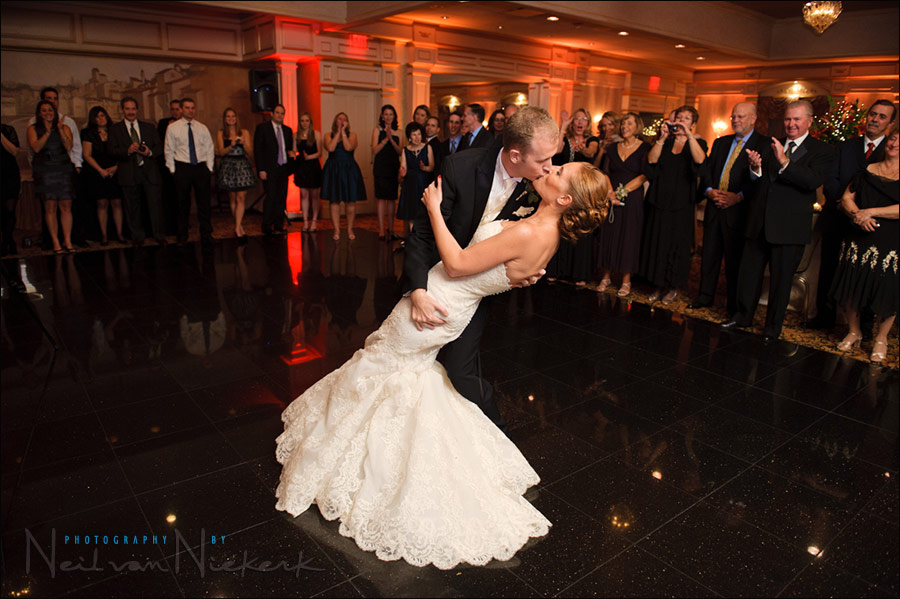
camera settings: 1/60 @ 3.2 @ 1600 ISO
Nikon D3; (B&H); Nikon 24-70mm f2.8 AF-S (B&H) .. used around 24mm
Nikon SB-900 (B&H); Nikon SD-9 battery pack (B&H);
![]()
I do look out for other opportunities so that I am not just limited to using bounce flash. Here is an example of where I switched off my flash, and used the videographer’s light for a few of the images.
Shooting against the videographer’s light, I cranked up my ISO to get a romantic look. Here I am not aiming for ‘correct exposure’ of the bride’s face as she is turned to my camera. My exposure here is very much about the mood of the moment. The rim-lighting and suggestion of her expression and gesture is all-important here.
camera settings: 1/30 @ 2.8 @ 2500 ISO … no flash, just the video light
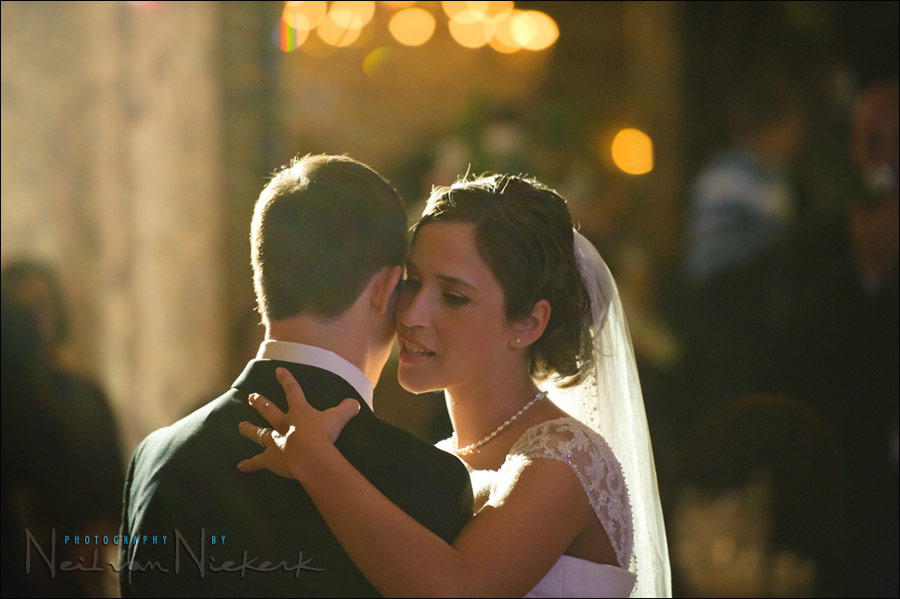
Swinging around, I had more direct use of the videographer’s light. I could’ve used some bounce flash here to ease the contrast, but I liked the strong light on them.
camera settings: 1/100 @ f2.8 @ 1600 ISO … no flash, just the videographer’s light.
Nikon D3; Nikon 70-200mm f2.8 AF-S VR II (B&H);
![]()
As I showed in the article already mentioned earlier on, switching it up like this gave me more variety. Not every photograph will work, therefore the ‘decisive moment’ is something I decide on during the editing process.
The key is to be flexible and be very familiar with the camera and flash’s controls. No fumbling!
This in a way reminds me of an article I read many many years ago in a photography magazine. Unfortunately, I can’t remember the author, but I seem to recall it was one of the entries in the regular ‘The 37th Frame’ column in the magazine? (American Photo?) Anyway, the author mentioned how news photographers would practice loading film in the dark while running. That idea really stuck with me. We need to be *that* familiar with our cameras. It’s much easier with digital of course, since there is no loading of film, but you get the idea. We need to know where every control is, and have it fall naturally under our fingertips in order for us not to have to think about the camera.


in Dept Reviews
Graphic designer, web designer and business man with really strong passion that specializes in marketing strategy.


0 Responses to “Wedding Photography : Mixing Up The Lighting Techniques”
Post a Comment